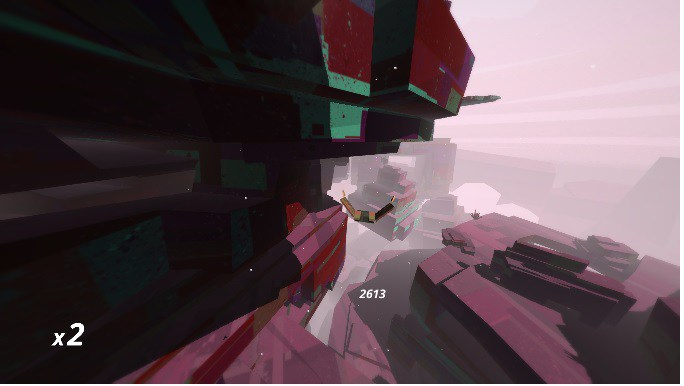
A few months ago, I downloaded Superflight on Steam. It’s an awesome game.
I thought it might be fun to play with a a joystick, but I didn’t have one… so I hacked one together with an Arduino Mega, an old Wii Nunchuk, and PySerial. The controller works by using the Arduino as an interface between the Nunchuk and computer (via USB) which allows our Python code to read & interpret the Nunchuk data and simulate keystrokes in the game. The entire hardware configuration and most of the code I needed was already generously available from Gabriel Bianconi’s Makezine article and Chris Kiehl’s Virtual Keystroke project.
The only real hardware change I made was the Arduino pin locations. For me on an Arduino Mega 2560, this was SDA: Pin 20 and SCL: Pin 21.
In the Arduino code from Bianconi’s article, I modified the Baud rate from 19200 to 9600. This seemed to be more stable for me, but I’m not sure if it was entirely necessary. Regardless of what rate you select, make sure the Baud rate matches in the Arduino and Python code.
I pruned a lot of the Nunchuk gyroscopic readings out of Bianconi’s Python code. Then I added the VK_CODE dictionary (partial) and “press” function from Chris Kiehls’ project which takes advantage of the win32api to simulate keystrokes on a Windows machine. Finally, I modified some of the existing logic to “press” the arrow keys when the Wii joystick was moved in the corresponding direction. My python code ended up looking like this:
"""
Building a Superflight Controller with a Wii Nunchuk

Note: Must run with Python 2.
"""

# Import the required libraries for this script
import string, time, serial, win32api, win32con

#Dictonary to hold key name and VK value
VK_CODE = {'left_arrow':0x25,
           'up_arrow':0x26,
           'right_arrow':0x27,
           'down_arrow':0x28,}

#press keys
def press(*args):
    '''
    one press, one release.
    accepts as many arguments as you want. e.g. press('left_arrow', 'a','b').
    '''
    for i in args:
        win32api.keybd_event(VK_CODE[i], 0,0,0)
        time.sleep(.001)
        win32api.keybd_event(VK_CODE[i],0 ,win32con.KEYEVENTF_KEYUP ,0)

# The port to which your Arduino board is connected
port = 'COM3'

# Invert y-axis (True/False)
invertY = False

# The cursor speed
cursorSpeed = 20

# The baudrate of the Arduino program
baudrate = 9600

# Variables indicating whether the mouse buttons are pressed or not
leftDown = False
rightDown = False

# Variables indicating the center position (no movement) of the controller
midAnalogY = 130
midAnalogX = 125

if port == 'arduino_port':
    print('Please set up the Arduino port.')
    while 1:
        time.sleep(1)

# Connect to the serial port
ser = serial.Serial(port, baudrate, timeout = 1)

# Wait 5s for things to stabilize
time.sleep(5)

# While the serial port is open
while ser.isOpen():

    # Read one line
    line = ser.readline()

    # Strip the ending (\r\n)
    line = string.strip(line, '\r\n')

    # Split the string into an array containing the data from the Wii Nunchuk
    line = string.split(line, ' ')

    print(line)

    # Set variables for each of the values
    analogX = int(line[0])
    analogY = int(line[1])
    zButton = int(line[5])

    threshold=25

    # If the analog stick is not centered
    if((analogY-midAnalogY)>threshold):
        press('up_arrow')
    elif((analogY-midAnalogY)threshold):
        press('right_arrow')
    elif((analogX-midAnalogX):
        press('left_arrow')

# After the program is over, close the serial port connection
ser.close()
To summarize, the overall process looks something like this:
- Connect the Wii Nunchuk to the Arduino as shown in the Makezine article. Make sure you wire the Nunchuk to your SDA and SCL pins – these might be different that what’s shown in the article depending on what Arduino model you have.
- Connect the Arduino to your computer through USB and upload Bianconi’s Arduino sketches. Take note of what baud rate you’re using.
- Save the python code (shown above) to your local machine. Update the baud rate as needed – make sure it’s the same as what is listed in your Arduino code. Make sure you have all python library dependencies installed.
- Open a terminal. CD to whatever directory you saved the python code to. Run the .py file using Python 2. If you attempt to run it with Python 3, it probably won’t work.
- Open Superflight and have fun.
A few closing thoughts:
- The overall setup is still a little bit unstable. The python code seems to crash after a few minutes. A few parameters to troubleshoot with are the threshold variable, the sleep duration, and the baud rate.
- A definite improvement would be to make the Nunchuk trigger buttons work in the menu for a more complete controller. But the keyboard still works.
- Another big improvement would be to re-write the python code to use a variable rate of virtual button-pressing based on how far from the origin the controller is.
- For a more long-term hardware design, we could design & 3D-print an enclosure that houses an ATtiny which runs the Arduino code. From the outside, it would just look like a Nunchuk-to-USB cable.
- Maybe it would have been more interesting to use the Wii Gyro data instead of the joystick?